How to Create a ZIP File on Android Using ZArchiver APK

Managing files on an Android device often means combining large documents, photos, videos, or folders into one file. A ZIP archive makes this much easier. It keeps everything together in a single file, which is easier to share through email, cloud storage, messaging apps, or file-sharing services.

Android can open many ZIP files without extra apps. However, its built-in tools offer only basic features. If more control is needed, ZArchiver is a better choice. It lets users create ZIP files, choose different compression levels, protect archives with passwords, split large archives into smaller parts, and work with many archive formats.

This guide explains how to create a ZIP file on Android with the ZArchiver APK, change compression settings, use password protection, and fix common storage permission problems.

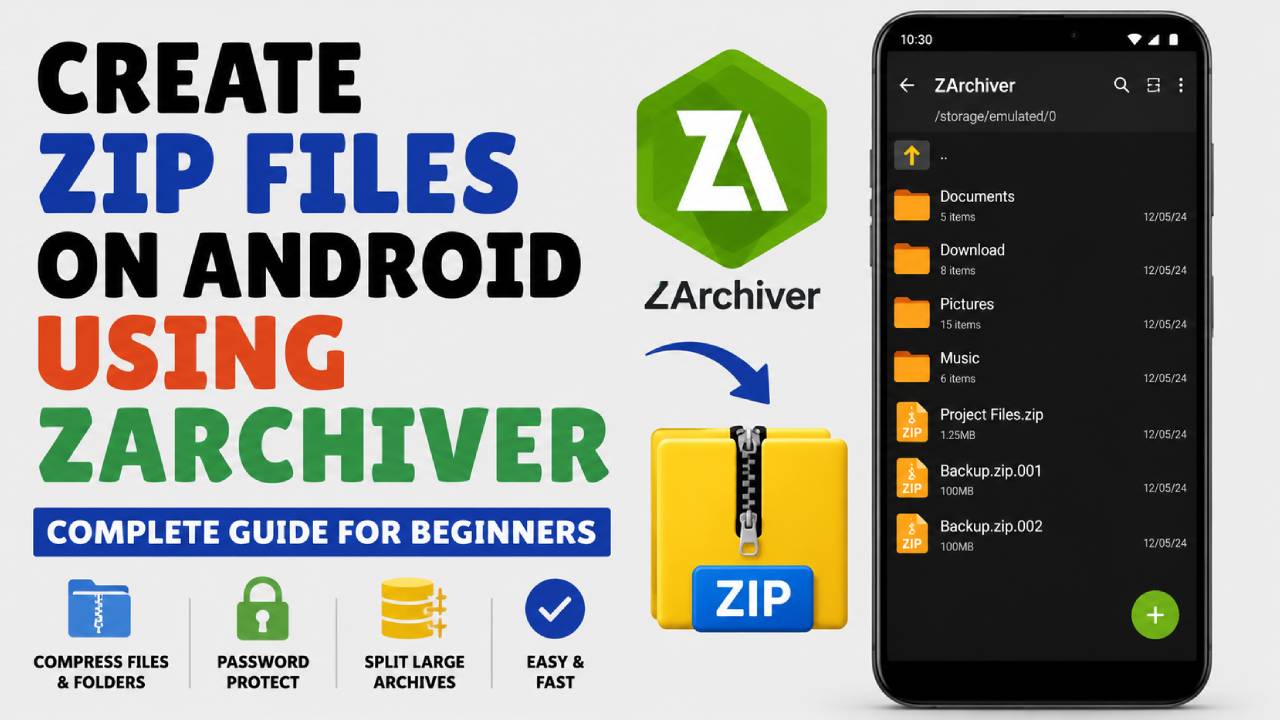
how to create a zip file on android using zarchiver

What Is ZArchiver and Why Use It?

ZArchiver is a small and fast file management and archive application made for Android devices. It supports many archive formats, including .zip, .7z, .tar, .rar, and .iso. It also allows users to edit some archives without extracting everything first.

Unlike many basic file managers, ZArchiver gives more control over how archives are created. This makes it useful for both simple file compression and advanced archive management.

Main Benefits of ZArchiver for Creating ZIP Files

Multiple Compression Levels

ZArchiver offers several compression levels. Users can choose Store for the fastest process or Ultra for the highest file compression. This makes it easier to balance speed and file size based on the situation.

Password Protection

Sensitive files can be protected with a password before creating the ZIP archive. ZArchiver supports both ZipCrypto and AES-256 encryption.

Split Large Archives

Very large ZIP files can be divided into smaller parts. For example, a large archive can be split into 100 MB or 1 GB pieces. This helps when sending files through email or uploading them to services with file size limits.

Works with Modern Android Versions

ZArchiver supports the Storage Access Framework (SAF). Because of this, it works properly with Android 11, Android 12, Android 13, and Android 14, even with the newer storage permission system.

Step 1: Install ZArchiver and Give Storage Permissions

Before creating ZIP files, ZArchiver needs permission to access the device storage.

  1. Download and install ZArchiver from the Google Play Store or another trusted APK source.
  2. Open the application.
  3. When permission requests appear, allow All files access on Android 11 and newer devices. Older Android versions may only request standard storage permission.
  4. If files are stored on a microSD card, allow access when Android opens the built-in file picker. Select the correct SD card folder and confirm the permission.

After these permissions are given, ZArchiver can read and create files in supported storage locations.

Step 2: Create a ZIP File from a Single File or Folder

Creating a ZIP archive from one file or one folder is simple and only takes a few steps.

Method A: Create a ZIP File with Default Settings

This method uses the default ZIP settings.

  1. Open ZArchiver.
  2. Browse to the folder that contains the file or folder to compress. For example:

/storage/emulated/0/Download

  1. Press and hold the file or folder.
  2. Select *Compress to .zip from the menu.

ZArchiver immediately creates a ZIP file in the same location using the default compression settings.

*Long Press Item → Tap “Compress to .zip” → ZIP File Created

Method B: Create a ZIP File with Custom Settings

This method is better when custom settings are needed.

  1. Open ZArchiver.
  2. Find the file or folder.
  3. Press and hold the item.
  4. Select Compress…

The archive settings window will open.

Configure the following options:

  • Archive name: Enter the preferred file name. Make sure the name ends with .zip.
  • Archive format: Select ZIP.
  • Compression level: Choose the compression level that best matches the required speed and file size.
  • Password (Optional): Enter a password if the archive needs protection.

After choosing the settings, tap OK.

ZArchiver will begin creating the ZIP archive.

Step 3: Compress Multiple Files into One ZIP Archive

Sometimes several files need to be placed inside one ZIP file. ZArchiver makes this easy through multi-selection.

Follow these steps:

  1. Open the folder that contains the required files.
  2. Tap the Multi-select button, which looks like a checklist. Some versions also allow selecting files by tapping their icons directly.
  3. Select every file and folder to include.
  4. Selected items will become highlighted.
  5. Tap the green checkmark to confirm the selection.
  6. Tap the Compress button.
  7. Choose the preferred archive settings.
  8. Tap OK.

ZArchiver creates one ZIP archive containing every selected file and folder.

ZArchiver Compression Level Guide

Choosing the right compression level helps improve speed or reduce file size, depending on the file type.

Compression Level Speed File Size Reduction Best For
Store Instant None (0%) Already compressed files like MP3, MP4, JPG, and PNG
Fastest / Fast Very Fast Low (10–20%) Fast transfers where speed is more important than size
Normal Medium Balanced Documents, APK files, and mixed folders
Maximum / Ultra Slow Highest (30–60% or more) Text files, source code, logs, and database backups

Helpful Tip

Photos in JPG format and videos in MP4 format are already compressed. Because of this, using Ultra usually saves very little space while taking much longer to finish.

For these file types, Store or Fast is usually the better option. It saves processing time and uses less battery power.

Advanced Features

ZArchiver includes several advanced options for users who need more control over their archives.

Protect a ZIP File with a Password

Password protection keeps the archive safe from unauthorized access.

Follow these steps:

  1. Open the Compress… settings window.
  2. Enter a password in the Password field.
  3. Select an encryption method.

The available encryption options include:

ZipCrypto

  • Compatible with many archive programs.
  • Works well with older operating systems.

AES-256

  • Provides stronger protection.
  • Recommended for personal or sensitive files.

After selecting the encryption method, tap OK to create the protected ZIP file.

Create Split ZIP Archives

Large archives can be divided into smaller files.

This is useful when email services or cloud storage providers have upload size limits.

To split an archive:

  1. Open the Compress… settings.
  2. Find the Split into volumes option.
  3. Select one of the available sizes, such as:
    • 10 MB
    • 100 MB
    • 2000 MB
  4. A custom size can also be entered manually.
  5. Tap OK.

ZArchiver creates multiple files with names similar to:

  • filename.zip.001
  • filename.zip.002
  • filename.zip.003

All parts are needed later when extracting the archive.

Fix Common ZArchiver Problems

Sometimes ZArchiver may show an error while creating or accessing archives. The following solutions fix the most common problems.

1. “Access Denied” or Permission Error on Android 11 and Later

Cause

Android uses Scoped Storage on newer versions. Because of this, applications cannot freely access every folder unless permission has been granted.

Solution

  • Open Android Settings.
  • Go to Apps.
  • Select ZArchiver.
  • Open Permissions.
  • Turn on Allow management of all files if the option is available.
  • If access is still blocked, use the Storage Access Framework prompt inside ZArchiver and allow access to the required folder.

After the correct permissions are given, try creating the ZIP file again.

2. “Operation Completed with Errors”

Cause

This message usually appears when:

  • The files are open in another application.
  • The storage contains damaged sectors.
  • The files are stored inside a read-only folder.

Solution

Close any applications that may still be using the files.

If needed, copy the files into a normal folder such as Download or Documents, and then create the archive again.

3. ZIP File Cannot Be Opened on Windows or macOS

Cause

This usually happens because:

  • The archive name contains unsupported special characters.
  • Older archive programs do not support the selected encryption method, especially AES-256.

Solution

Use simple letters, numbers, and basic symbols when naming the archive.

If the archive uses advanced encryption, open it with archive software that supports modern ZIP features instead of older built-in extraction tools.

Final Thoughts

ZArchiver makes it easy to create ZIP files on Android while giving much more control than the built-in file manager. Users can quickly compress a single file, combine multiple folders into one archive, choose different compression levels, protect files with passwords, and split very large archives into smaller parts.

With the correct storage permissions and the right compression settings, ZArchiver works smoothly on modern Android versions and handles everyday file compression tasks with ease.

3uTools Review: Best Windows Tool for iPhone and iPad Management

3uTools has become one of the most useful tools for Windows users who want more control over their iPhone, iPad, or iPod Touch. Apple gives users official tools like iTunes on Windows and Finder on macOS, but those tools have many limits. In comparison, 3uTools brings many advanced features together in one simple desktop program.

The software combines device management, firmware handling, diagnostics, file management, and many other useful functions in a single interface. As a result, users do not need to install several different programs to complete common tasks.

Whether someone wants to organize photos and music or repair an iPhone with firmware problems, 3uTools offers features that make these jobs much easier. It gives Windows users more freedom while still working with Apple’s ecosystem.

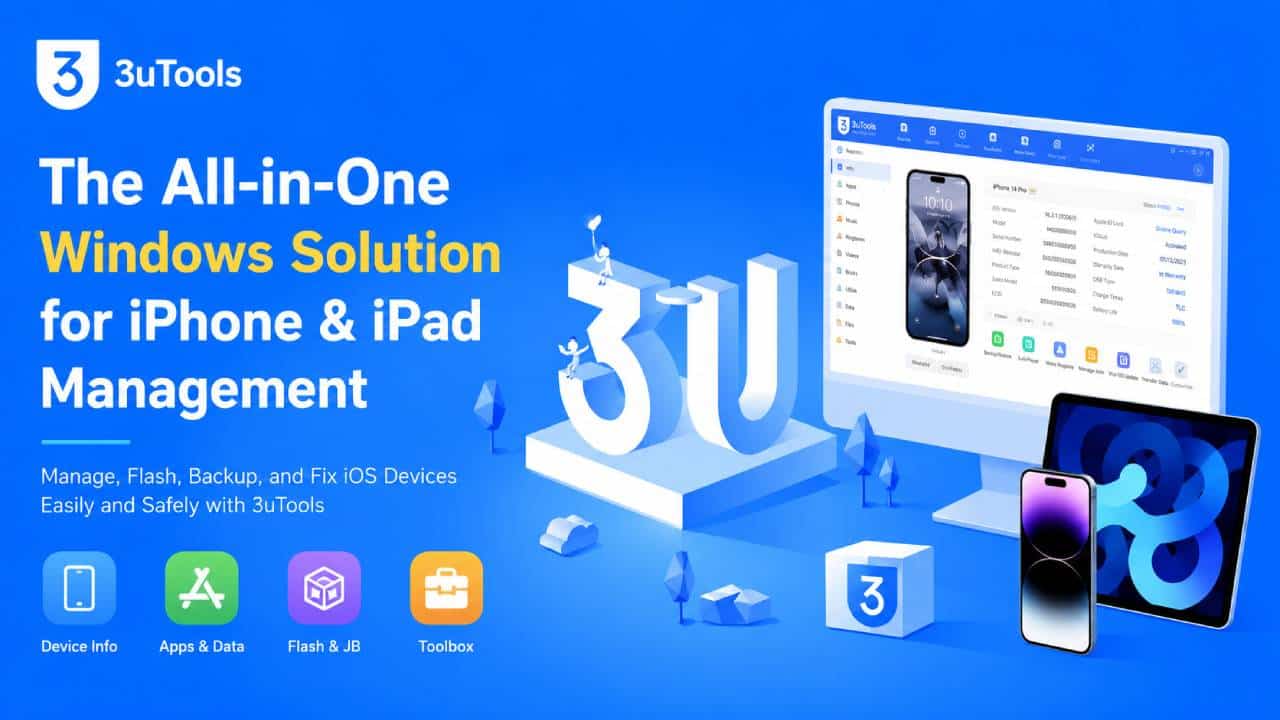
3utools review

Core Features and How It Works

One of the biggest strengths of 3uTools is its clean layout. Instead of placing every feature on one screen, the software divides everything into four main sections: Device, Apps, Flash & JB, and Toolbox.

This simple layout helps both new users and experienced technicians find the tools they need without spending too much time searching through menus.

Device Information and Diagnostics

After connecting an iPhone or iPad, 3uTools quickly scans the device and displays detailed information. The software provides much more information than what users normally see in the iPhone Settings app.

Users can check several important details, including:

Hardware Information

The software shows battery health, battery cycle count, serial number, storage details, and other hardware information. This helps users understand the current condition of the device before making repairs or replacing parts.

Security Information

3uTools also displays the activation lock status, IMEI number, baseband version, and other important security details. These details are especially useful when checking a used device before buying or repairing it.

System Logs

The built-in syslog viewer helps technicians find hidden system errors and background crashes. Many of these problems do not appear inside the normal iOS settings, so the logs make troubleshooting much easier.

Firmware Management (IPSW)

Firmware management is one of the strongest parts of 3uTools. The software connects directly to Apple’s servers and downloads signed IPSW firmware files when they are available.

This removes much of the manual work that users normally face during firmware installation.

One-Click Flashing

The flashing process is simple. After downloading the correct firmware, users can choose either Quick Flash or Retain User Data mode.

Quick Flash performs a clean installation, while Retain User Data tries to keep personal files during the update whenever possible.

This simple process saves time and reduces mistakes that can happen during manual firmware installation.

Recovery Mode and DFU Mode Support

Entering Recovery Mode or DFU Mode can sometimes be confusing because the button combinations must be performed correctly.

3uTools solves this problem by showing clear step-by-step instructions on the screen. As a result, users can place the device into the correct mode with much less frustration.

Data Management and Media Tools

Besides firmware management, 3uTools also works as a complete media and file management program.

Users can manage many types of files without depending only on iTunes.

File System Access

The software lets users browse the device file system, export app data, transfer files, and create local backups.

This gives users more control over their stored data and makes backup management much easier.

Media Conversion

3uTools includes several built-in media tools.

For example, users can convert HEIC images into JPG files, extract audio from videos, and create custom ringtones.

Because these tools are already included, there is no need to install extra media conversion software for these common jobs.

Technical Performance and Safety

3uTools is available as freeware, and it offers many advanced features without requiring payment. However, users should still be careful before performing system-level operations.

The software gives powerful control over iOS devices, so using the correct settings is very important.

Feature Compatibility Requirement
OS Support Windows 7, Windows 8, Windows 10, Windows 11 Direct USB connection
Device Support iPhone, iPad, iPod Touch Apple-certified cable is recommended
Firmware Actions Depends on Apple’s signing status Active internet connection for IPSW download

Important Safety Information

Although 3uTools is powerful, some features should be used carefully.

Firmware Risks

Firmware flashing always carries some level of risk. A failed installation may cause data loss or require another restore.

For that reason, users should always create a full backup through the Backup/Restore section before starting any firmware operation.

A backup can save important photos, documents, contacts, and other personal data if something goes wrong.

Jailbreak Risks

3uTools also includes jailbreak-related functions.

Using jailbreak tools may cancel Apple’s warranty and may also reduce the security of the device.

Before using any jailbreak feature, users should understand the method being used and the possible risks involved.

Hardware Compatibility

Every iPhone and iPad model uses specific firmware versions.

Installing firmware that does not match the device model may cause boot loops or even leave the device unable to start.

Checking the exact model and processor before flashing firmware helps avoid these problems.

Who Should Use 3uTools?

3uTools is useful for many different types of users because it combines simple features with advanced system tools. You can easily 3utools Free Download from the official website.

Casual Users

People who simply want an easier way to transfer photos, manage music, create custom ringtones, or free up storage space will find 3uTools much easier than using iTunes alone.

The interface is simple, and many common tasks require only a few clicks.

Repair Technicians

Repair shops and technicians often rely on detailed device information during repairs.

3uTools helps identify hardware replacements, check battery condition, activate devices, and recover phones that no longer start properly.

These features save time during daily repair work.

Advanced Users

Power users often need more control than Apple’s official software provides.

3uTools supports app management, local backups, file system access, firmware flashing, and testing different iOS versions whenever Apple’s signing status allows those installations.

This extra control makes it useful for users who regularly work with iOS devices.

Solving Common Problems

Sometimes users may face problems while using 3uTools. Fortunately, many of these problems have simple solutions.

Device Is Not Detected

If the device does not appear inside 3uTools, first make sure the latest version of the software is installed.

Next, check that the Apple USB drivers are properly installed on Windows.

If necessary, reinstall or repair the drivers through the Toolbox section.

A different USB cable or USB port may also solve the problem.

Flash Failure

If firmware flashing fails, first check that the internet connection is stable.

An unstable connection may interrupt the IPSW download or Apple’s verification process.

It may also help to temporarily disable antivirus or firewall software if it is blocking communication during the flashing process.

Advanced Mode Errors

Users sometimes try to install an older iOS version.

However, Apple only allows installation of firmware versions that are currently signed.

If Apple has stopped signing a specific version, 3uTools cannot install it, regardless of the selected settings.

Final Thoughts

3uTools continues to be one of the best Windows utilities for managing iPhones, iPads, and iPod Touch devices. It successfully combines advanced device management, firmware handling, diagnostics, backup tools, media management, and troubleshooting features into one easy-to-use program.

Although firmware flashing and jailbreak functions should always be used carefully, the software offers a wide range of useful tools for both everyday users and experienced technicians.

For Windows users who want more control than Apple’s official software provides, 3uTools remains a reliable and practical all-in-one solution.

How to Manage Risk in Aviator and Protect Your Bankroll

Aviator, created by Spribe, changed the way crash games work. The game uses a live multiplayer system where a plane takes off and a multiplier keeps rising. The goal is simple. Players must cash out before the plane flies away and the round ends.

Although the game looks easy, the mathematics behind it is important. Many players lose money because they let emotions control their decisions. Greed can make players wait too long. Fear can make players cash out too early. Because of this, a clear risk management system is necessary.

Aviator operates with a 97% Return to Player (RTP). This means the game has a fixed 3% house edge. Every round is completely independent from previous rounds. The outcome is generated by a provably fair Random Number Generator (RNG). No player can predict the next result. No player can influence the multiplier.

For that reason, success in Aviator does not come from finding secret patterns, prediction software, or signal groups. Real success comes from managing risk properly and protecting the bankroll over time.

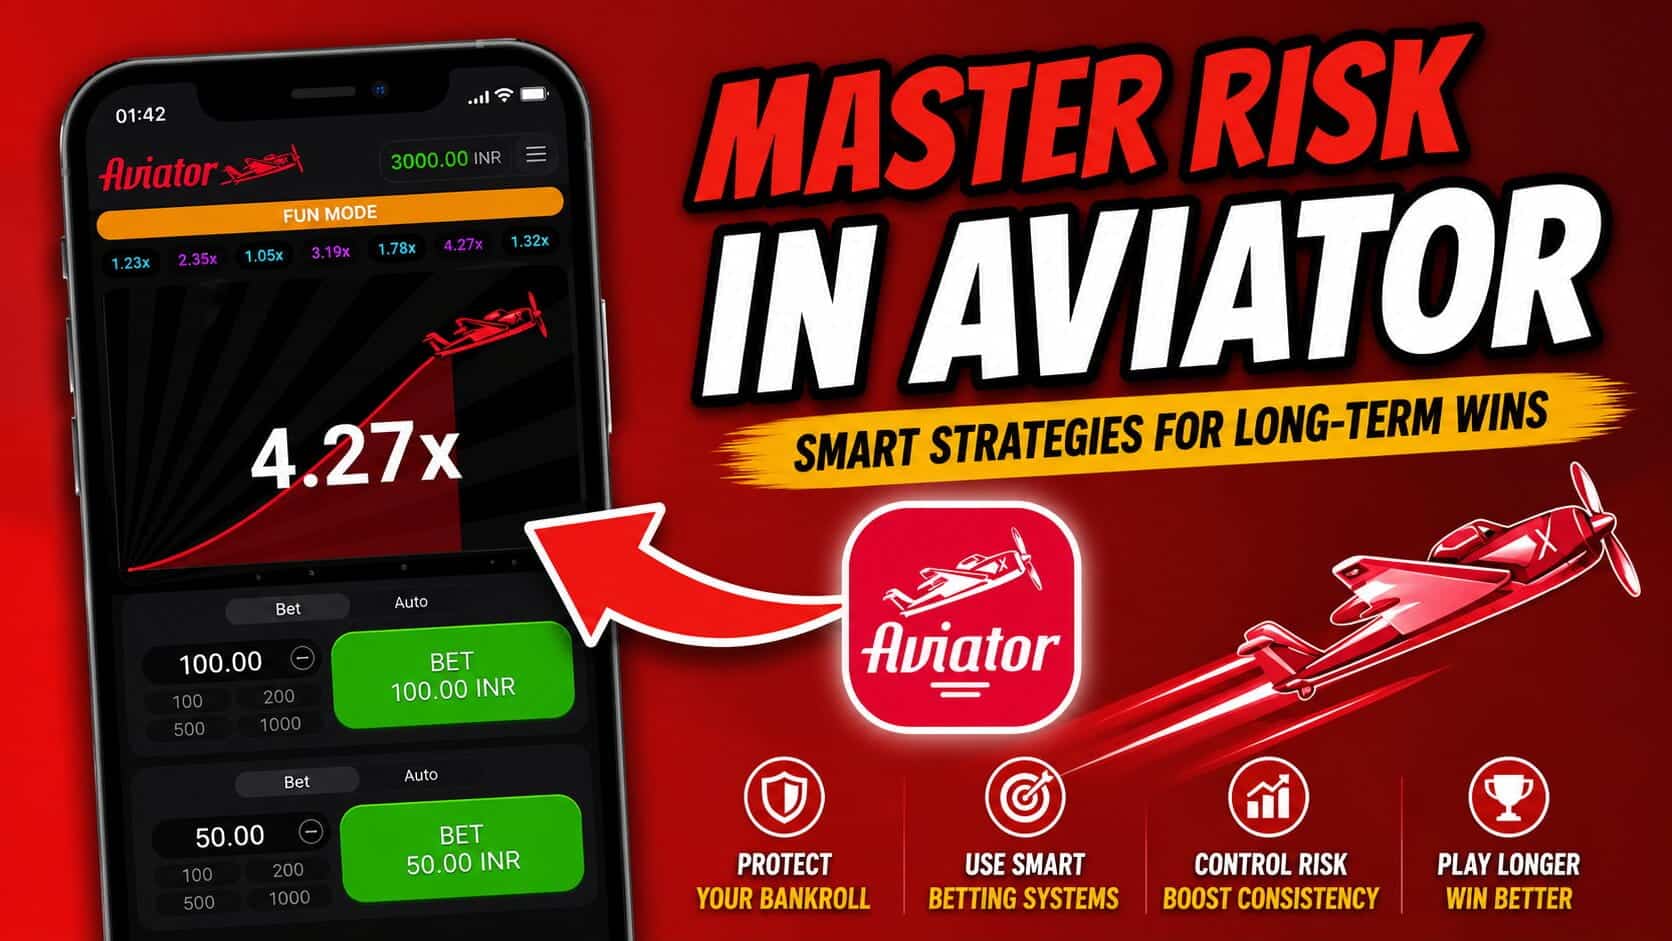
manage risk in aviator

Understanding the Mathematics Behind the Crash System

A strong risk management plan starts with understanding how the multiplier system works.

In Aviator, the probability of reaching a target multiplier is calculated using the following formula:

P(m) = 0.97 / m

This formula creates an inverse relationship between the multiplier and the probability of reaching it. As the target multiplier increases, the chance of success becomes lower.

Here are some examples:

Target Multiplier: 1.20x

The probability of reaching 1.20x is approximately 80.8%.

This means the multiplier reaches 1.20x in most rounds. Because of this high success rate, many players use low cash-out targets as part of a conservative strategy.

Target Multiplier: 2.00x

The probability of reaching 2.00x is approximately 48.5%.

This is close to a coin toss. About half of the rounds will reach this level, while the other half will crash before it.

Target Multiplier: 10.00x

The probability of reaching 10.00x is approximately 9.7%.

High multipliers can generate large profits. However, they occur much less often. Therefore, relying only on large multipliers can create long losing streaks.

Another important part of the system is the instant crash event. Sometimes the multiplier crashes at exactly 1.00x. When this happens, every active bet loses immediately.

This feature is important because it can destroy aggressive betting systems. Strategies that depend on increasing bet sizes after losses can suffer significant damage during these sudden crashes.

As a result, risk management methods should always be built to survive these rare but unavoidable events.

Risk Management Strategies for Aviator

Good risk management removes emotion from the decision-making process. Instead of reacting to every round, players can use automation tools and predefined rules.

This approach creates a more structured system and reduces impulsive decisions.

1. The Dual-Bet Strategy

Aviator allows two separate bets to run on the same round. This feature can be used to create a balanced risk structure.

Bet A: The Protection Bet

The first bet uses a larger amount of money.

Many players allocate around 2% to 3% of their session bankroll to this bet.

The Auto Cash Out feature can be set to 1.50x.

When this target is reached, the return helps cover most or all of the risk from both active bets.

The purpose of this bet is stability rather than large profits.

Bet B: The Growth Bet

The second bet uses a smaller amount of money.

Many players allocate around 0.5% to 1% of the bankroll.

This bet targets higher multipliers such as 5.00x or 10.00x.

Because the stake is smaller, the financial risk remains limited. At the same time, the potential reward is much larger.

Together, these two bets create a balance between protection and growth.

2. Low-Variance Automation Strategy

Some players focus on preserving their bankroll for longer sessions.

This strategy uses lower multipliers and automated cash-out settings.

The Auto Cash Out feature can be set between 1.20x and 1.35x.

Statistically, this range provides a success rate of roughly 72% to 80%.

The profit from each win is smaller. However, the higher win frequency can help reduce large bankroll swings.

Even so, instant crashes and early busts can still occur. Therefore, players should expect occasional losing streaks.

The goal of this strategy is not fast profits. Instead, the goal is slower bankroll growth with lower overall risk.

Important Risk Control Rules

Even the best strategy can fail without proper discipline.

Every session should follow strict financial rules. These rules help protect the bankroll and prevent emotional decisions.

Session Limit

Use no more than 5% of the total gambling bankroll for a single session.

If this amount is lost, the session should end immediately.

Continuing after reaching the limit often leads to poor decisions.

Stop-Loss Rule

Set a maximum loss streak limit.

A common example is five losing rounds in a row.

Once this limit is reached, stop playing and take a break.

This cooling-off period helps prevent emotional betting.

Take-Profit Rule

Set a profit target before starting.

Many players use a target between 20% and 30% of the session bankroll.

After reaching the target, withdraw the profit and end the session.

Locking in profits helps protect gains from later losses.

Base Bet Size

Keep each bet between 1% and 2% of the current bankroll.

Avoid increasing bet sizes after losses.

A consistent bet size creates better long-term stability.

Common Mistakes and How to Fix Them

Even with a solid strategy, mistakes can still happen. Most problems come from emotions or technical issues.

Understanding these problems can help improve overall performance.

Chasing Losses and the Martingale Problem

The Problem

After several losing rounds, some players start increasing their bet sizes.

They believe a big multiplier must appear soon.

As a result, they double or triple their stakes in an attempt to recover losses quickly.

The Real Cause

This behavior is often caused by the Gambler’s Fallacy.

The Gambler’s Fallacy is the belief that previous outcomes influence future outcomes.

In reality, Aviator’s RNG does not remember past rounds.

Each round is completely independent.

A long losing streak does not increase the chance of a future win.

The Solution

Set betting amounts before the session starts.

Use automated betting tools whenever possible.

Avoid changing bet sizes during live gameplay.

This removes emotional decision-making from the process.

Manual Cash-Out Delays

The Problem

A player may click the Cash Out button at 2.10x.

However, the game server may record a crash at 2.08x before the command arrives.

The result is a loss even though the button was clicked.

The Real Cause

This issue happens because of network latency.

Data must travel between the player’s device and the game server.

Even small delays can affect timing.

The Solution

Use the Auto Cash Out feature instead of manual cash-outs for important targets.

Auto Cash Out works directly through the server system.

Because of this, it avoids delays caused by internet speed or reaction time.

Aviator Predictors and Third-Party Tools

Many players also search for Aviator predictors, signal tools, bots, or software that claim to predict the next crash point. These tools are often advertised as systems that can identify patterns and provide advance warnings before a round starts.

The reason these tools attract attention is simple. Players naturally want a way to reduce uncertainty and improve their results. As a result, Aviator Predictor software and signal services have become popular in some gaming communities.

However, it is important to understand how Aviator works. The game uses a provably fair Random Number Generator (RNG), and each round is generated independently. Previous multipliers do not affect future multipliers. Because of this, no external tool can reliably predict the exact crash point of upcoming rounds.

Even so, some players still choose to use predictor tools as part of their overall approach. They may use them for tracking historical results, monitoring multiplier trends, or organizing betting decisions. While these tools can provide additional data and statistics, they should not be viewed as guaranteed prediction systems.

Risk management should always remain the primary focus. Regardless of whether a player uses a predictor, signal service, or manual strategy, proper bankroll management, disciplined bet sizing, and strict stop-loss rules remain the most important factors for long-term sustainability.

Final Thoughts

Aviator is a game of probability, not prediction. Every round is independent, and no strategy can guarantee a win. The RNG determines all outcomes, while the house edge remains constant.

Because of this, long-term survival depends on risk management rather than guessing future results. Players who control their bankroll, use disciplined bet sizing, follow stop-loss limits, and rely on automation often create more stable sessions.

The objective is not to predict the next crash. The objective is to manage risk effectively and protect capital through both winning and losing periods.

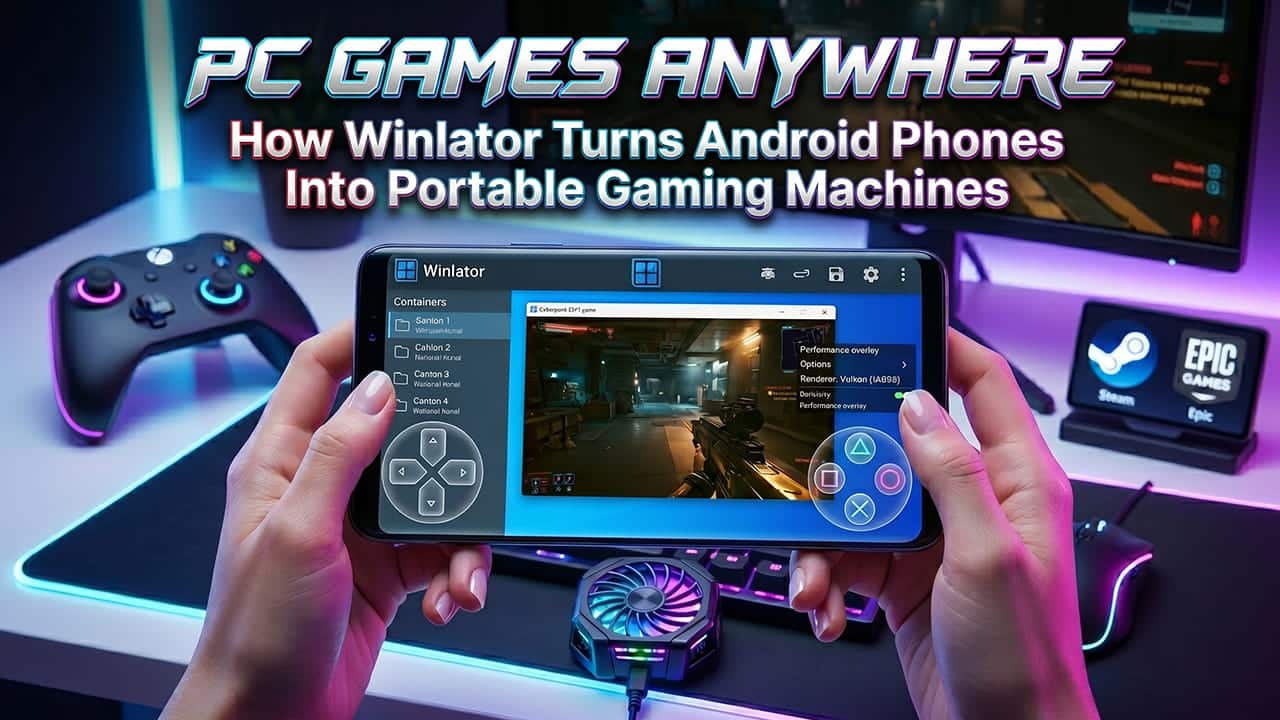
Turn Your Phone Into a Portable Gaming PC Using Winlator

Handheld PC gaming became popular because of devices like the Steam Deck, ROG Ally, and Legion Go. These devices can run real PC games in a portable form. However, carrying another large device is not always easy. Many people already carry a powerful Android phone every day. Because of that, Android phones are now becoming small gaming PCs.

For years, mobile gaming mostly meant simple games, online-only titles, or games filled with ads. Cloud gaming also became popular, but it depends heavily on a fast and stable internet connection. Now things are changing very quickly. New open-source software allows Android phones to run real Windows PC games directly on the device itself.

At the center of this change is Winlator. This emulator turns high-end Android phones into portable PC gaming systems. Instead of streaming games from another computer, Winlator runs many Windows games directly on the phone hardware.

winlator android portable gaming pc

How Winlator Actually Works

Winlator does not work like normal cloud gaming apps. It does not stream gameplay from servers far away. Instead, it runs the game locally on the Android device. That is a very difficult task because Windows games are built for x86 and x64 desktop processors from Intel and AMD, while Android phones use ARM processors.

To solve this problem, Winlator uses several software layers together.

The Main Software Behind Winlator

Wine

Wine stands for “Wine Is Not an Emulator.” It acts like a bridge between Windows software and Android. When a Windows game asks for memory, sound, graphics, or storage access, Wine translates those requests into something Android can understand.

This process allows many Windows applications to work without installing a full Windows operating system.

Box86 and Box64

Box86 and Box64 handle CPU instruction translation.

Box86 converts older 32-bit x86 instructions into ARM instructions. Box64 does the same for modern 64-bit applications. Instead of translating everything at once, they only recompile the code needed at that moment. Because of that, performance stays much better than a full virtual machine.

This method also reduces CPU load and saves system resources for gaming performance.

Graphics Translation and Vulkan Support

CPU translation alone is not enough. Graphics processing is another major challenge.

Most Windows PC games use Microsoft DirectX. Android devices mainly use Vulkan or OpenGL ES. These graphics systems are very different from each other.

Winlator solves this problem with translation layers like DXVK and VKD3D.

DXVK converts Direct3D 9, 10, and 11 commands into Vulkan commands. VKD3D handles Direct3D 12 games. Because Vulkan is very efficient, many games perform surprisingly well on strong Android hardware.

This translation happens in real time while the game runs.

Why Snapdragon Phones Perform Better

The biggest performance difference in Android PC emulation comes from the phone chipset.

Phones using Qualcomm Snapdragon processors usually perform much better than MediaTek or Exynos devices. The main reason is support for Turnip drivers.

Turnip Drivers

Turnip drivers are custom open-source Vulkan drivers made for Adreno GPUs found inside Snapdragon processors. These drivers reduce graphics overhead and improve Vulkan performance heavily.

Because of this, Snapdragon phones can run many Windows games with much higher frame rates.

Mali GPU Problems

Phones using MediaTek Dimensity or Samsung Exynos chips often use Mali GPUs. These devices usually depend on VirGL instead of Turnip.

VirGL works, but performance is much lower. Many games suffer from graphical bugs, low frame rates, or missing textures. Some games may not launch at all.

That is why most Winlator users strongly prefer Snapdragon devices.

Hardware Requirements for Winlator

Running PC games on a phone requires strong hardware. Older phones can still run lightweight games, but modern games need powerful components.

Component Minimum Recommended
Processor Snapdragon 845 / 855 Snapdragon 8 Gen 2, Gen 3, or 8 Elite
RAM 6 GB 12 GB to 16 GB
Storage 64 GB 256 GB to 512 GB
Android Version Android 8 Android 14 or newer

RAM is extremely important because the phone shares memory between Android, Winlator, the game, and virtual VRAM. Low memory often causes crashes or freezing.

Storage also matters a lot. Modern PC games are very large. Just a few games can easily fill over 100 GB.

Fast storage speeds also reduce loading times.

Setting Up Containers for Better Performance

Winlator uses isolated environments called Containers. Every container can have different settings for different games.

Correct setup makes a massive difference.

Create a Container

After installing Winlator, open the app and press the “+” icon. Create a new container and give it a clear name.

Many users create separate containers for older games and newer games.

Lower the Resolution

Reducing resolution greatly improves performance.

Instead of using high resolutions, many users choose 800×600 or 960×544. Lower resolutions reduce GPU stress and increase frame rates.

This is one of the biggest performance improvements available.

Choose the Correct Graphics Driver

Snapdragon phones should use:

  • Turnip (Adreno)
  • DXVK

MediaTek or Exynos devices usually work better with:

  • VirGL
  • WineD3D

Sometimes changing these settings fixes crashes or graphical problems.

Adjust Box86 and Box64 Presets

Inside the Advanced tab, Winlator allows preset changes.

Performance mode increases speed for well-optimized games. Compatibility mode improves stability for games that crash often.

Some games work perfectly in Performance mode, while others need Compatibility mode to launch correctly.

Running Steam Games on Android

Many users want access to their Steam library.

Simple DRM-free games from stores like GOG.com are usually easier to run. Users can copy game files directly into phone storage and launch the executable.

Steam itself is heavier.

Why Steam Uses So Much Performance

The Steam client contains browser processes and background services. These processes use RAM and CPU power before the game even starts.

To reduce this problem, many advanced users launch Steam with custom batch files. These scripts disable unnecessary features and force lightweight interface modes.

This leaves more system power available for gaming.

Community Forks and LSFG

Because Winlator is open-source, many developers create custom versions called forks.

Some forks include extra optimizations and additional gaming tools.

One important feature is Lossless Scaling Frame Generation, also called LSFG.

How LSFG Works

LSFG uses frame generation and image upscaling.

For example, a game may render internally at 480p and 30 FPS. LSFG can upscale the image to 720p and generate extra frames to make gameplay appear smoother.

This does not magically increase hardware power, but it can improve visual smoothness significantly.

Many users report better gameplay with LSFG enabled.

Controls and Gamepad Support

PC games normally expect keyboards, mice, or controllers.

Winlator includes customizable touch controls directly on the screen. Users can place virtual buttons, analog sticks, and keyboard keys anywhere they want.

However, physical controllers provide a much better experience.

Devices like the Razer Kishi and Backbone One connect through USB-C or Bluetooth. These controllers make the phone feel much closer to a real handheld console.

Many users completely disable touch controls after connecting a controller.

Heat and Thermal Throttling Problems

Heat is one of the biggest problems in Android PC emulation.

Unlike handheld gaming PCs, smartphones do not contain large cooling fans. They mostly rely on passive cooling through the phone body.

During long gaming sessions, temperatures rise very quickly.

When the phone becomes too hot, Android lowers CPU and GPU speeds automatically. This process is called thermal throttling.

Once throttling starts, frame rates can drop heavily.

External Cooling Solutions

Many Winlator users attach external cooling fans to the back of the phone.

These coolers reduce temperatures and help maintain stable performance for longer gaming sessions.

Cooling accessories cannot fully replace proper internal cooling systems, but they help a lot during heavy gaming.

Is Winlator a Real Steam Deck Alternative?

Winlator is not as simple as using a dedicated handheld gaming device. Games still need tweaking, testing, and optimization. Some titles work perfectly, while others crash or refuse to launch.

Still, the progress is impressive.

Modern Android phones are now powerful enough to run many real Windows games locally. Older AAA games, indie titles, RPGs, racing games, and strategy games can already work surprisingly well.

For users who enjoy testing hardware limits, changing settings, and improving performance, Winlator opens a completely new type of mobile gaming experience.

Instead of carrying another gaming device, many users can now turn the smartphone already sitting in their pocket into a portable PC gaming machine.

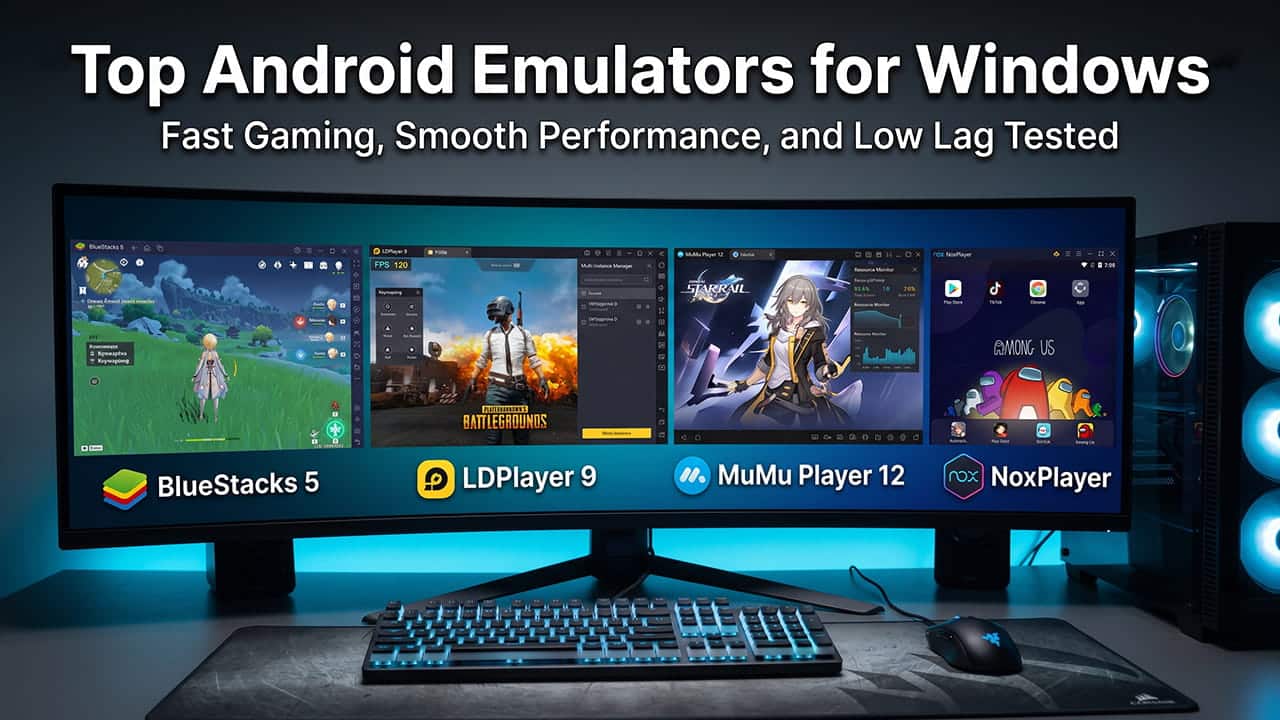
Best Android Emulator for Windows Tested and Ranked in 2026

Running mobile games and Android apps only on a phone is no longer necessary. A Windows PC gives more power, better graphics, and a larger screen. Because of that, Android emulators have become very popular for gaming, testing apps, and daily use.

However, not every emulator works the same way. Some focus on gaming speed, while others focus on app support or automation tools. A good emulator should offer stable frame rates, smooth controls, and low system usage without slowing down the computer.

Instead of looking through outdated software, this guide focuses on the best Android emulators available right now. Each option below explains where the emulator performs best and which type of user should choose it.

best android emulator for windows tested and ranked

Why Run Android Apps on a Windows PC?

Android emulators remove many limits found on smartphones. A desktop computer has stronger hardware, so apps and games can run more smoothly.

Here are the biggest advantages.

Better Hardware Performance

Phones often slow down during long gaming sessions because of heat. Battery drain also becomes a major problem. On a PC, these issues are far less noticeable. Desktop hardware can handle heavy tasks more easily.

Storage limits also become less stressful. Large games and apps can run without quickly filling up device space.

Better Controls

Touch controls are useful, but keyboards and gaming mice offer more accuracy. Most Android emulators allow users to map touch actions directly to keyboard keys or controllers.

This helps greatly in shooting games, racing games, and MOBAs where quick reactions matter.

Run Multiple Apps at Once

Many emulators support multi-instance features. This means several apps or games can run at the same time on one computer.

Some users run multiple game accounts together. Others use one instance for gaming while another handles background tasks.

The Top Android Emulators for Windows

1. LDPlayer 9: Best for Fast Performance and Low Lag

PROS: Very low input delay, lightweight, smooth performance on both low-end and high-end PCs.
CONS: Mostly designed for gaming users.

LDPlayer 9 focuses heavily on gaming performance. The software uses an optimized Android 9 system that keeps CPU and GPU usage under control.

One of the biggest strengths of LDPlayer 9 is its low input delay. Actions feel quick and responsive during gameplay. Fast shooting games and competitive multiplayer titles run very smoothly.

Another major advantage is resource efficiency. Compared to many other emulators, LDPlayer uses less RAM and fewer background processes. Because of that, older computers can still achieve stable performance.

The interface also feels clean and simple. There is less unnecessary software running in the background, which helps improve stability.

Users who need extra tools can still access advanced settings. These include macro recording, FPS adjustments, keyboard mapping, and performance tuning options.

For people who want a lightweight emulator without unnecessary extras, the official LDPlayer Latest Version Download remains one of the strongest choices available today.

2. BlueStacks 5: Best for Features and App Support

PROS: Large feature list, strong app compatibility, support for modern Android versions.
CONS: Uses more RAM and system resources.

BlueStacks is one of the oldest and most recognized Android emulators. BlueStacks 5 continues to offer a large number of features for both gaming and general Android use.

The emulator supports many apps very well. This includes mobile games, productivity apps, messaging apps, and streaming platforms.

BlueStacks also includes several useful tools. Users can switch between DirectX and OpenGL graphics modes depending on system performance. Eco Mode helps reduce resource usage during background tasks. Real-time translation tools are also available in supported apps.

The emulator works best on mid-range and high-end systems. Older computers may struggle because BlueStacks uses more RAM and GPU power than lighter alternatives.

Still, users who need wide app support and many extra features often choose BlueStacks because of its flexibility.

3. MuMu Player 12: Best for Very High Frame Rates

PROS: Extremely smooth visuals, supports very high refresh rates, and advanced graphics performance.
CONS: Less focused on non-gaming apps.

MuMu Player 12 was developed mainly for gamers who want the smoothest possible gameplay.

Its biggest feature is high refresh rate support. On compatible monitors, supported games can reach extremely high frame rates for smoother motion and faster visual response.

This makes a noticeable difference in action games where movement speed matters.

The emulator also keeps the interface simple and clean. Most settings focus directly on gaming performance instead of general Android features.

Because of that, MuMu Player may not be the best choice for users who mainly need productivity apps or broad Android support. However, for competitive gaming and visual smoothness, it performs extremely well.

High-end PCs benefit the most from this emulator since powerful hardware is needed to fully use ultra-high frame rates.

4. NoxPlayer: Best for Automation and Advanced Users

PROS: Excellent macro tools, flexible root settings, strong multi-instance controls.
CONS: Can use high CPU power during heavy multitasking.

NoxPlayer has remained popular for users who need advanced control features.

One major reason is its macro system. Users can record actions and replay them automatically. This helps greatly in repetitive tasks and automated workflows.

Root access can also be enabled easily. Advanced users often prefer this because it allows deeper control over Android applications and settings.

The multi-instance synchronization feature is another strong point. Actions performed in one emulator window can copy automatically across multiple windows.

This becomes very useful for users managing several accounts at once.

However, heavy multi-instance use can increase CPU usage significantly. Mid-range and high-end systems usually handle this better than low-end hardware.

Even with higher system usage, NoxPlayer remains one of the most flexible Android emulators available.

Quick Comparison Table

Emulator Main Purpose Best Hardware Type Android Version
LDPlayer 9 Competitive gaming and low lag Low-end to high-end PCs Android 9
BlueStacks 5 General apps and gaming Mid-range to high-end PCs Android 11 / 13 Beta
MuMu Player 12 Ultra-high FPS gaming High-end PCs Android 12
NoxPlayer Automation and multi-instance tasks Mid-range to high-end PCs Android 7 / 9

How to Reduce Emulator Lag

Even the best emulator can perform poorly if Windows settings are not configured correctly. These adjustments can improve speed and stability greatly.

Enable Hardware Virtualization

This is the most important setting for emulator performance.

Without virtualization enabled, the emulator must rely on slower software processing methods. Performance can drop heavily.

To enable virtualization:

  1. Restart the computer.
  2. Open the BIOS or UEFI menu using keys like DEL, F2, or F12.
  3. Find CPU settings.
  4. Enable Intel Virtualization Technology or AMD SVM Mode.
  5. Save settings and restart the computer.

After enabling this feature, emulator performance usually improves immediately.

Allocate Hardware Carefully

Giving all system resources to the emulator can actually reduce performance. Windows still needs RAM and CPU power for background operations.

Recommended settings include:

  • Quad-core CPUs: Allocate only 2 CPU cores to the emulator.
  • 16GB RAM systems: Allocate around 4GB RAM to the emulator.

Balanced resource allocation helps maintain smoother overall system stability.

Which One Should You Choose?

The best Android emulator depends mainly on hardware and usage style.

For users who want low lag, fast response times, lightweight performance, and smooth gameplay across many system types, the LDPlayer Latest Version Download remains one of the strongest overall choices.

BlueStacks 5 works very well for users needing wide app support and many built-in features. Meanwhile, MuMu Player 12 is ideal for gamers focused mainly on very high frame rates and visual smoothness.

For automation tasks, advanced scripts, and heavy multi-instance usage, NoxPlayer continues to be a strong option for experienced users.

How to Remove Wrinkles from Clothes in Pictures for Free

When you want a professional photo, clothes with wrinkles can ruin it. This will mostly have bad impacts when you do photography for clothing brands or fashion shows. In that case, you can edit your bad photos with apps and software. In this article, we are going to tell you about these articles.

how to remove wrinkles from clothes in pictures

YouCam Perfect

First, download the app and launch it. You can get the app for free from the Apple Store or Google Play. Then, upload the photo you want to edit. After that, select the areas you want to change. The app has its own intelligence method. So, you don’t have to worry about making cloth patterns from your own. After choosing the area, click on the apply button. Then it will make the un-wrinkle cloth for you.

After done with the editing and you are satisfied with the result you can save it. For that, you can see a green check in the bottom right corner. It can save your photos to the app. There is a save button in the upper right corner. Tap on it to save your photos to your phone.

Photoshop

Adobe Photoshop offers a good toolbox to remove wrinkles from your clothes. It has two methods to do this.

First Method

In this method, you can manually remove wrinkles. It can be done with a combination of Photoshop healing tools.

From Patch Tool: This is good for larger wrinkles or areas. With the patch tool, you can select the area and make a smooth area with the same fabric and it acts as a patch. Photoshop can blend the patch with the area and make it more realistic.

Healing Brush Tool: First, sample a smooth area of fabric near the wrinkle area and use the healing brush to paint on the wrinkle area. It can replace the area with a wrinkled one.

Stamp Tool: with the Stamp tool, you can clone a smooth area of the fabric. Then, you can cover up the wrinkle area with it. This is good for pattern clothes when the pattern is repetitive.

Second Method

In this method, we use frequency separation for editing. In this process, we split the image into two layers. They are High Frequency and Low Frequency. After that, you can use the blur tool on the high-frequency layer. With that, you can smooth wrinkles while saving the texture details. After doing the edit, combine the high-frequency one with the low-frequency one. it will give a wrinkle-free natural-looking image.

Evoto AI

This AI tool has special design sections based on the wrinkle size and texture.

De-wrinkle: This is the overall wrinkle remover. This can analyze your image with built-in intelligence and remove any wrinkles to make your image clothes wrinkle-free.  

Fine Wrinkles Remove: This is for thin wrinkles. You can often see these wrinkles on shirts and dresses. It has a Remove Fine Wrinkles slider. With that, you can focus on wrinkles while saving the natural look of the app.

Coarse Wrinkles Remove: This is good for removing larger creases and folds.

The above three methods are the best and most used Wrinkle removal methods. They will help you to get wrinkle-free and good-looking photos.

Common Product Photography Mistakes to Avoid for Better Sales

Product photography plays a huge role in your product marketing process. A good photograph can trigger and convince your customers easily. But what happens when you make some mistakes in your product photography? It will definitely affect the overall sales process. In this article, we are going to talk about the common mistakes you make when there is product photography and how to avoid them.

product photography mistakes

Wrong Shape

The best angle to shoot is 360 degrees when it comes to product photography. If you do not show the real shape of your product customers can’t get the overall idea about it. With 360-degree photography, customers can see the product from all angles and make the decision. If you can’t take a 360-degree one you can capture shots from all sides.

Brand/ Logo is Not Clear

Brand or Logo shows to the customer who’s the owner of the product. How can they buy something when they don’t know the ownership? You don’t have to show your whole brand name. Sometimes, a small part of it is enough. Focus on the Logo also. It shows your iconic ownership to the customers. Some customers buy things because of the brand.

Insufficient Depth

Depth can give a good idea about the 3D view of the product. If it is a lack of attention you can see some parts of the photo are missing or can’t see properly. This can divert the minds of buyers to another product. You can change the camera settings to get the full sharpness. But when the item is smaller you have difficulty capturing it with the correct depth. In that case, you can use the focus stacking technique.

Unfaithful Colors

Sometimes the retoucher tries to make the photo colorful and more attractive. In that case, they can edit the colors and it can give more unrealistic colors. When editing the photos keep in mind that customers have different types of screens. Laptops, phones, desktops and their contrast is different from each other. Try to use the sRGB color space and limit post-production effects.

Inconsistency of Product Photos

When it comes to the e-commerce stores, we use pack photos to give a good idea about the product. But in this, we have to follow the same pattern and style. When the style changes, it gets the attention of the customer, and it can distract their mind. To maintain consistency, use the same background for all the photos and highlight the product from the background. A good background can reduce the bounce rate. Place the product in the right part of the photograph. Try to follow a pattern and make a rotation. These simple techniques can keep the product attractive.

Shadow and Reflections

When it comes to managing the light in photography, the main problem is the shadow. When the shadow is too deep, it gives an unwanted and unnatural look. It can also hide details about the photo. To deal with deep shadows, allow the main light to reach the product from all angles. Shadow and reflection play a huge role in customer’s choice. When the shop produces photos with mistakes, it shows a lack of professionalism, and it can divert the mind to shift to another product. The problem is that lighting in photography is a difficult part to do. Try to take some sampling photos and understand the process.

Why Do These Mistakes Happen?

Low Budget

Most people try to do the selling part with a low budget. In that case, they only put a small amount of money into the photography parts. Some mistakes can’t be avoided with cheap items. For that photographers have to use expensive equipment and it may cost a lot.

Tight Schedule

When the schedules are tight even experienced photographers make mistakes and it causes them to give an output with many mistakes. they didn’t pay attention to the small details. To avoid this try to reach out to them sometime before the shoot and do a good communication about your requirements and time schedules.

Knowledge Gaps

A beginner can make more mistakes than an experienced one. And sometimes, the experienced one is better than the knowledgeable one. So, try to hire a good one in this case. Also, sometimes, the lack of experience in sales can result in a bad output.

How to Improve

Before being an expert everyone is a beginner. So, don’t worry when you make mistakes. try to avoid previously mentioned mistakes and do things better. Also, when you make a mistake note down it and next time try to avoid it. Collect feedback from the customers and other colleagues. Try to connect with industry professionals and get advice from them.

How to Make a Photo Collage on iPhone: 3 Easy Ways

An image can express emotions, and it is clear to everyone. But when it comes to collages of images, you can take that feelings and emotions to another level. With a collage, you can share multiple images at one time and also make a flow of new emotions. Choosing the right photos and arranging them in the order you want also gives some joy. With modern technology, making a collage is now easier than ever. There are a lot of third-party apps and some in-built apps for this customization. iPhone also offers these apps, and with them, you can arrange your favorite photos the way you want. In this article, we are going to explain how you can make a collage on an iPhone and the ways you can follow it.

There are plenty of apps and ways to do this, but here, we are going to show only the three main ways to create a collage.

1. Shortcuts

This is an in-built app you get with your iPhone. This app helps you to make a photo collage in minutes by following some simple steps. First, open your shortcuts app. Then,

  1. After opening it, you can see a Gallery option at the bottom of the screen. Tap on it.
  2. Next, in the search box, type “Photo Grid”.
  3. Then tap on the Photo Grid icon, and you will have to choose the Add shortcut option. This adds a photo grid to your app.make a photo collage on an iphone shortcuts app
  4. Then, go back to the main page and tap on the new Photo Grid.
  5. It will redirect you to the iPhone Photos app.
  6. Now you can select all photos you want to add to the Collage. When you select you can see a checkmark in the top right corner of each photo.how to make a photo collage on an iphone shortcuts app
  7. Then select the Save option.

Then the shortcuts app automatically makes a collage with a grid view. This has features to change the layout, format, and order as you want. after doing the process you can save the output to the camera folder and share it.

2. Google Photos

Basically, Google Photos acts as a photo management app, but when it comes to the iPhone, it also has a collage-making feature. To use this,

  1. First, download and launch the Google Photos app.
  2. Then, sign in to your Google account through the app.
  3. At the bottom of the screen, you can see the Library tab. Tap on it.
  4. Go to the Utilities section.how to make a photo collage on an iphone using google photos app
  5. You can see the Create New tab, and under it, tap on Collage.
  6. You can select photos between two and nine.
  7. Then tap on Create, and it will make a collage of the photos you selected.
  8. With the Edit icon, you can make changes to the Collage.

Then tap on save, and it will be stored in Google Photos.

3. Photoroom

This is another app but this one is a third-party app. The main purpose of this app is to help users to create stunning visuals. But users also can make collages here.

how to make a photo collage on an iphone using photoroom app

  • First, download the app and launch it.
  • Then tap on Start from photo. With this, you can select photos from your album.
  • Then choose the photo you want and the app will automatically remove the background. But you can save the original one if you want.
  • Then tap on the Insert at the bottom of the screen. This will give access to add other photos you want.
  • Repeat this process until you make the Collage you want and you can edit photos as you want. Then tap on Save.

There is another way to make a collage in this app. You can use templates and edit them with your photos.

Each of these apps gives you an amazing output and makes your collage-making process a lot smoother. Choose the one you want and make stunning collages. 

How To Take Better Travel Photos | Travel Photography Guide

Photography and traveling are two factors that go together. When we are in new and beautiful places and have new experiences, we want to capture them for remembering. But most of the time the photos’ output doesn’t go the way you want. there are a lot of reasons to get this type of bad output. But with the best preparations and tips, we can take good photos. In this article, we are going to talk about the tips you want to make a good travel photography process.

travel photography guide

Know the Camera

This is one of the basic ones. If you don’t know how to take a good photo with your camera, Try to know your camera before you start to travel. Use the user manual and read guides. Try to capture simple day-to-day life scenarios and practice well. With good practice, you can use your camera without any hassle.

Rule of Thirds

Rule of Thirds is one of the best rules that can make your photos more visually interesting and more attractive. In this, the photography will be divided into three grids, both horizontally and vertically. To do this, use two horizontal and vertical lines. Here you can see four points where horizontal and vertical lines intersect. Put your most important objects on these four spots if there is a human in the photo, place the person on the left or right gridline. If there is a horizontal line place it on of the horizontal line. Nowadays most cameras give this grid view to get the rule of thirds to our photos.

Try Unique Angles

Most time, people try to get photos by raising their cameras to their eye level. Even though this can give you a good output. But when it comes to travel photography the more your photos are unique, the more you get attention from viewers. This may be a unique way only you can capture photos. Maybe when you do it, it appears as a crazy stance, but it can give you a good output

Do Some Research

Before you go to a place to travel, do some research about that place. Go to Google and look for a travel guide or a blog. From these sources, you can see what are the places you can get the photos you want and what are the best places to visit. This information also helps you to book hotels in these areas. After you travel to the desired place, take a look at souvenir books and postcards. With them, you can get an idea about popular travel destinations. With this effort, you can get some of the most amazing photos.

Try to Capture the Golden Hour

The Golden hour is the first hour of the sunrise and the last hour of the sunset. At this time the light is perfect and good for photography. If you can capture your photos in that time your photos will be much greater than others. To do this you have to do some planning. Wake up before sunrise and go to the desired place or stay out till sunset. Also, at this time most places are empty than at other hours of the day.

Try to Create Depth

Good landscape photos have three layers. Foreground, background, and middle ground. The foreground is the one that attracts the viewers to your photos. The background is the one that keeps the viewer with your photos. The quality of each layer comes together to give a great output.

Get People to Photos

Each place has people with their unique identity. People in India are different from people in Africa. If you can capture this diversity into your lenses it can give you a lot of attraction. Before capturing anyone ask their permission politely. If you can’t speak their language just hold your camera and give a gesture. Some may say no, if that happens say thank you and move on. Most people are super friendly and help you.

Color and Light

Try to do color balancing and mostly light colors attract people than dark ones. If you can add some contrast between your background and your main subject it will pop up mainly. Try to get natural light and make your photo colorful. There are three main directions in which light comes naturally, and each has its pros and cons. Choose the one you want.


How To Use AI Face Swap for Free on Your Phone

People are sometimes bored with the normal photo look. So, they want to do something funny. Photo Swap is one of the best ideas for that. People like to swap their faces with their cousins, family members, or celebrities. In the past days, people have known Photoshop to do this face swap. But with the AI technology now there are a lot of apps to do this. Choosing one app from a bunch of apps may be a difficult task. In this article, we are going to talk about the best AI photo swap apps.

ai face swap apps

PhotoDirector

photodirector ai

This is one of the best photo editing apps in the world. You can edit any photo using AI technology with this app. The best part is this app is 100% free to use. It is available on both Android and Apple versions. For Swap faces with this app,

  •       First, download it from the Play Store or the App Store. Then launch the app.
  •       Then, in the main interface, scroll down, and you can see a bunch of AI tools. Here among other tools, select the AI Face Swap tool.
  •       In the app, you can select the photo and upload one as you want. they have 50 reference images to select. There are feminine styles and masculine styles. You can select the one you want.
  •       When you upload, upload a clear photo. Select a well-lit and front-facing photo.
  •       Then, swap the photo with your selected reference photo. After done, you can save it or share it as you want.

if you want to swap faces with cutouts and swap the one you want, there is also a feature. Import your photo to the app. Then select the AI cutout and swap faces. Select the output, save it, and share it with other platforms.

MyEdit

myedit ai

This app supports a wide range of file types and large-size files. The file storage limit is up to 50 MB. The AI technology ensures that the swap process will happen naturally and that there is no unrealistic swap. Apart from the swap feature, there are a lot of photo editing features here. With them, you can customize the edited photos. The interface is user-friendly, and you can get high-quality outputs. But the free version has limited features, and you have to buy the full version. 

Pica AI

pica ai

This app has one of the best features, which is face swapping in videos. Many apps don’t give this option. It also has a multi-face swapping feature. The process is really fast, and it gives you the feeling of real photos with AI technology. With the Pica AI, you don’t have to worry about the security features. They provide really good privacy to their customer’s photos. Even if the process is quick, it may be delayed when you use large files. And some advanced features require a subscription.

Remaker AI

remaker ai

Remaker AI offers a huge range of editing tools. These tools not only help you to do the face swap, but also you can edit the photos and tune them. This app is best for professional face swap processes. Results come with high quality and the user interface is very friendly. You can edit any photos within seconds. However, users have to buy a subscription plan to get some premium subscriptions.

Face Swapper – AI

face swapper ai

This app is great for people who like to get instant results without doing a lot of editing and waiting for results. The AI algorithm they use is simplified for fast editing. Other than photos, they support gif versions. But when you use the free version, they add watermarks.

When you install a face swap app look at the output quality and the features. Also, try to get a user-friendly one. then you can edit any photo without difficulty. When downloading think about the device compatibility. Most apps are available on both Android and iOS devices. If they are web-based you can try them on any device. Some apps are free and some apps require a subscription plan to edit photos. Be aware of these things, and make your photo face swap journey a fun ride.

Remini